Upgrading the turn signals on your KTM to sleek, modern LED indicators is one of the most popular and visually impactful modifications you can make. The stock incandescent indicators are often bulky and dim, while LED units are brighter, more durable, and give your bike a contemporary, race-inspired look . However, for a beginner, the installation can present a few unexpected challenges. This guide will walk you through the essential tips to make your first KTM LED indicator installation a smooth and successful experience.
The Critical “Hyperflash” Problem
The most common issue you will encounter when installing LED indicators is the dreaded “hyperflash” – when your turn signals flash at double or triple their normal speed. This happens because LED bulbs draw significantly less electrical current than the factory incandescent bulbs . Your KTM’s stock flasher relay interprets this lower power draw as a burnt-out bulb and speeds up the blinking rate to alert you . This is not a defect; it is simply your bike’s electrical system doing its job. Fortunately, there are two straightforward solutions to correct this.
Solution 1: Install an LED-Specific Flasher Relay
The easiest and cleanest solution is to replace your stock turn signal relay with an LED-compatible one . This is a plug-and-play fix. You simply locate your KTM’s factory relay (often under the seat or side panel), unplug it, and plug in the new LED flasher relay . This restores the correct flash rate without any cutting or splicing of wires, making it the ideal choice for beginners .
Solution 2: Wire in Load Resistors
An alternative is to wire a load resistor in parallel with each new LED indicator . These resistors mimic the electrical load of the old bulbs, tricking the system into flashing at a normal speed. This method is generally more involved, requiring you to splice the resistor into the indicator’s wiring, which can generate heat and is less elegant than a relay swap . For a beginner, the relay is almost always the better and simpler path.
Planning Your Installation
Before you start, it pays to have a plan. While many LED indicator kits are described as “plug-and-play,” you may find that the connectors on your new lights are different from your KTM’s factory harness . This is where a wiring diagram and a few basic connectors can save you a headache.
Check Your Kit: When you open the box, look at the wires and connectors on your new LED indicators. If they have bare wires or bullet connectors rather than a matching plug for your bike, you will need to do a simple solder or crimp connection .
Identify the Wiring: For KTM motorcycles, the wiring standard is often straightforward. For example, a universal tail light assembly might use a Black wire for Earth (Ground), Green for the Left Indicator, and Blue for the Right Indicator . Matching these colors correctly is crucial.
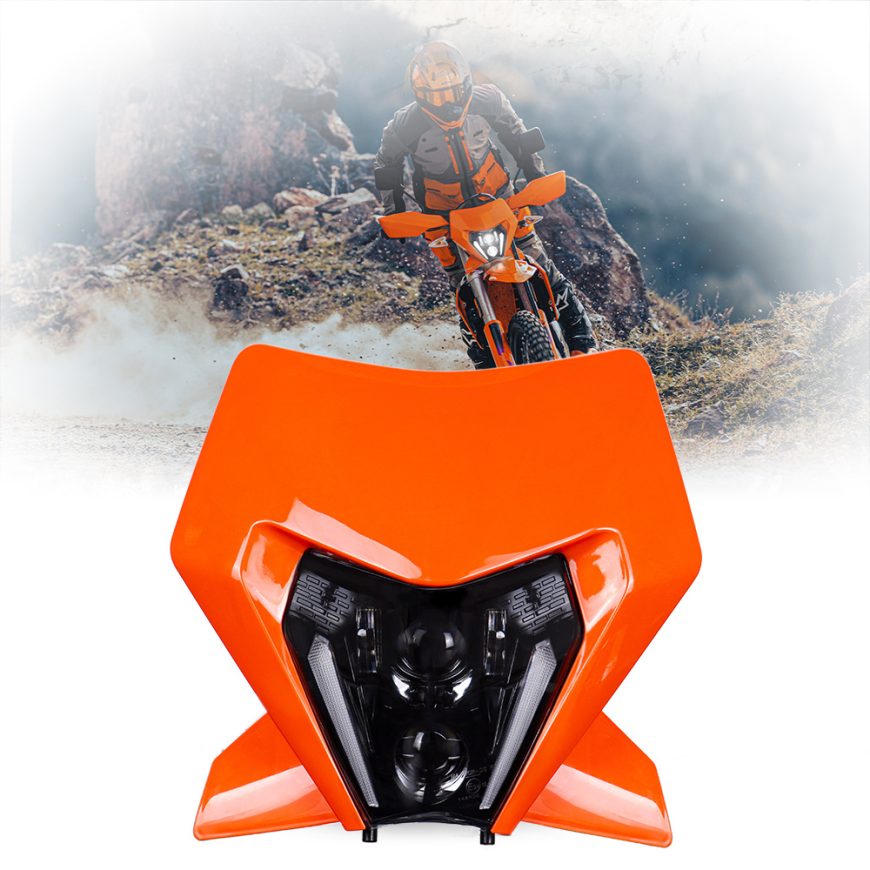
A Note on Headlights and Overall Lighting Balance
Before or while you are upgrading your indicators, it is worth considering the state of your KTM headlight. A brilliant new set of LED turn signals will make a dim, yellowed headlight look out of place. More importantly, upgrading your headlight to an LED unit can dramatically improve your nighttime visibility and safety . Many KTM owners find that converting the headlight is just as impactful as upgrading the indicators. The principles are similar: you might need to check for canbus compatibility on newer models , but many LED headlight kits are also designed for a straightforward plug-and-play installation . Taking a holistic approach to your KTM’s lighting ensures you achieve both a cohesive modern look and the best possible safety on the road. A well-lit front end combined with bright, correctly flashing indicators makes you far more visible to other road users .
Step-by-Step Installation Tips
Disconnect the Battery: For safety and to prevent any accidental short circuits, start by disconnecting the negative terminal of your battery .
Remove the Old Indicators: Carefully unscrew the old turn signals from their mounts. Take note of how the wires are routed so you can replicate the path for your new ones .
Test Before Final Mounting: Before you secure everything into place, connect your new LED indicators and test them. Check if they are flashing at the correct speed. If not, this is the time to install your new flasher relay .
Secure the Connections: Once you are satisfied that everything works, make your final connections permanent. If you are crimping or soldering, ensure the joints are solid and covered with heat-shrink tubing or electrical tape to prevent water ingress and shorts .
Mount the Indicators: Fix the new indicators securely in place, ensuring they are tight but not over-tightened, as you could crack the housing. The final result will be a sleek, modern-looking KTM with bright, perfectly timed turn signals that are sure to turn heads.